Introduction
Rancher is a container management platform that facilitates the use of OCI containers in production. Using Rancher, teams can securely manage multiple Kubernetes clusters and employ integrated DevOps tools for running containers.
Kubernetes' ability to quickly scale workloads by adding or removing cluster nodes is supported in Rancher with the node driver feature. Node drivers are Docker machine drivers that Rancher uses to provision new cluster nodes. Each host provider has its own node driver.
This tutorial will show you how to install, activate, and use node drivers in Rancher. The driver showcased in the article is phoenixNAP's Docker Machine Driver Plugin for Bare Metal Cloud.
Prerequisites
- Access to the Rancher dashboard.
- Manage Node Drivers role assigned (for adding/removing, activating/deactivating drivers).
- Host provider account (for example, BMC portal credentials).
Step 1: Install Node Driver
Rancher comes with several built-in node drivers from popular host providers. Furthermore, some host providers preinstall node drivers on the Rancher management cluster deployments that use their infrastructure.
The phoenixNAP BMC portal offers the Rancher BMC integration feature, with phoenixNAP's node driver preinstalled. However, if your management cluster is hosted on a different provider, and you want to add BMC nodes to your workload cluster, follow the steps below to install the phoenixNAP node driver on Rancher.
1. Visit the Docker Machine Driver Plugin for BMC on phoenixNAP's GitHub page.
2. Select the latest release in the Releases section of the page.
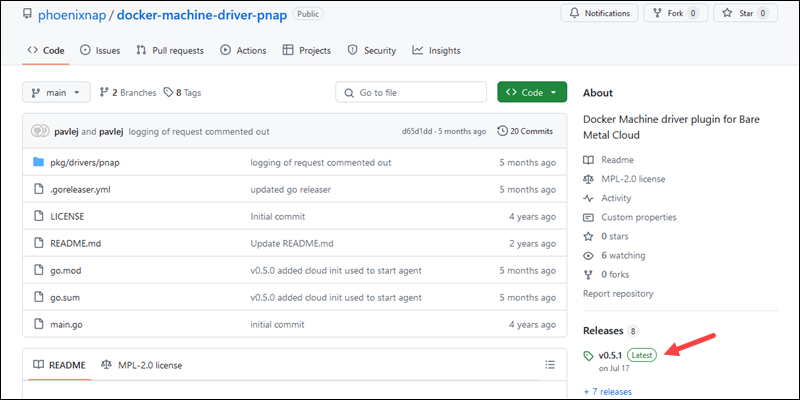
The Releases page opens.
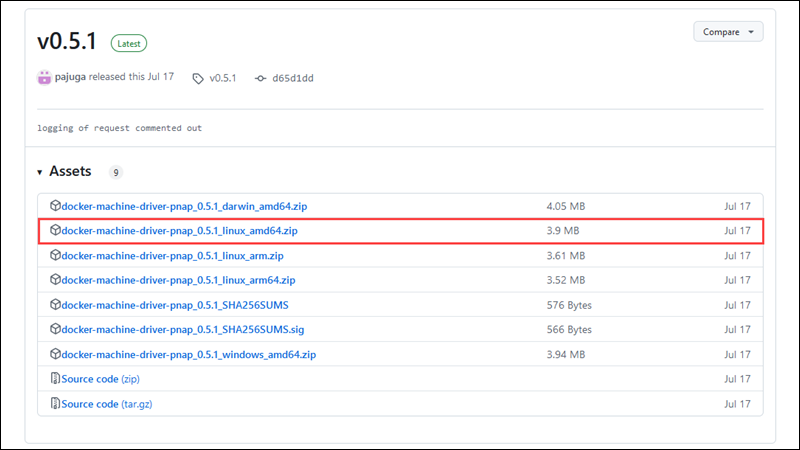
3. Right-click the link to the Linux amd64 version of the driver and select Copy link address.
4. In the Rancher UI, open the navigation bar by clicking the icon in the upper-left corner of the page, then select Cluster Management.
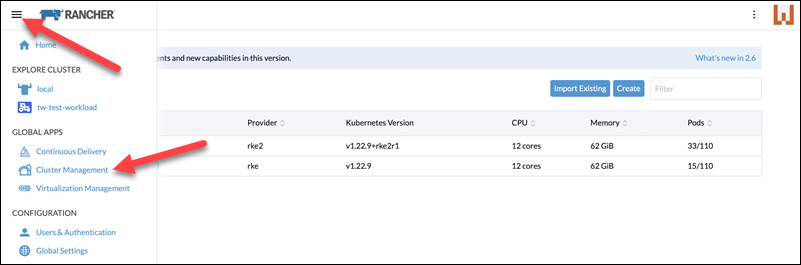
The Cluster Management page opens.
5. Click Drivers in the menu on the left side. The Drivers page contains the lists of available cluster and node drivers.
6. Select Node Drivers to open the node drivers section.
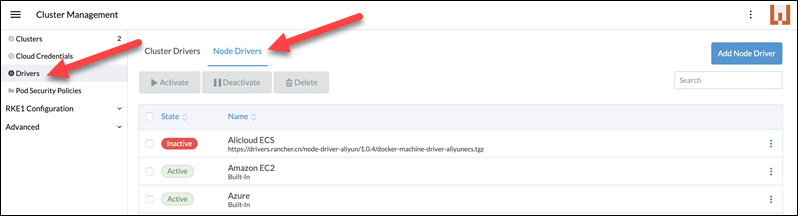
7. Select the Add Node Driver button in the upper-right corner of the page.

The Add Node Driver dialogue appears.
8. Paste the link you copied from GitHub into the Download URL field. Optionally, you can enter a custom UI URL and verify the downloaded driver with a checksum.
9. Select Create to finish adding the driver.
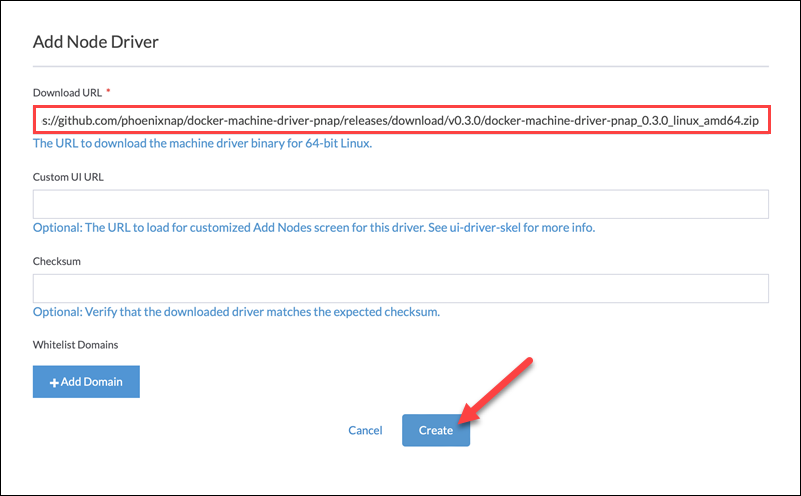
Once Rancher downloads and installs the node driver, it appears in the driver list as Active.

Activate Node Driver in Rancher
Installed node drivers in Rancher can be active and inactive. The inactive node drivers are kept on the system, but all their host provisioning features are disabled. To activate a node driver in Rancher:
1. Select the driver in the list of the installed drivers.
2. Click the Activate button.
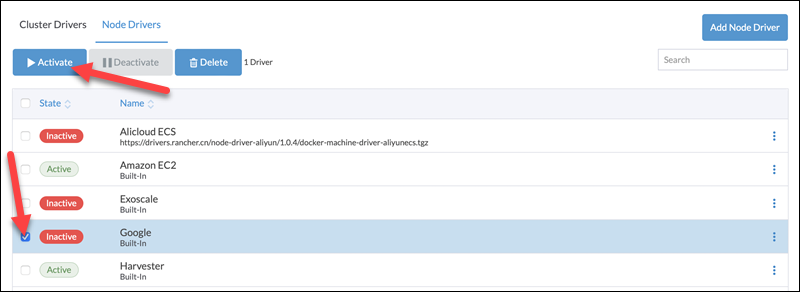
When Rancher activates a driver, the green Active tag appears next to the driver's name.
Step 2: Create New Node Pool
The primary purpose of node drivers in Rancher is to facilitate host provisioning. Hosts are organized in node pools, groups of cluster nodes with the same configuration. Follow the steps below to create a new node pool in Rancher.
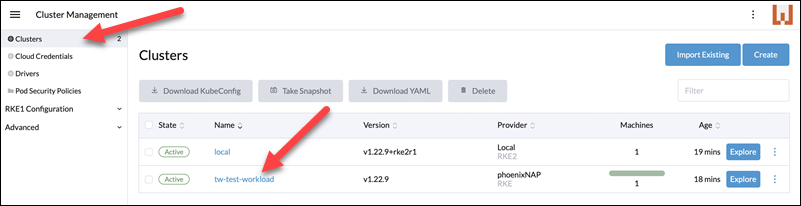
1. Select the Clusters item in the menu on the left-hand side of the Cluster Management page.
2. Select the cluster for the new node pool in the cluster list.
3. On the cluster page, select the Config button in the upper-right corner of the page.
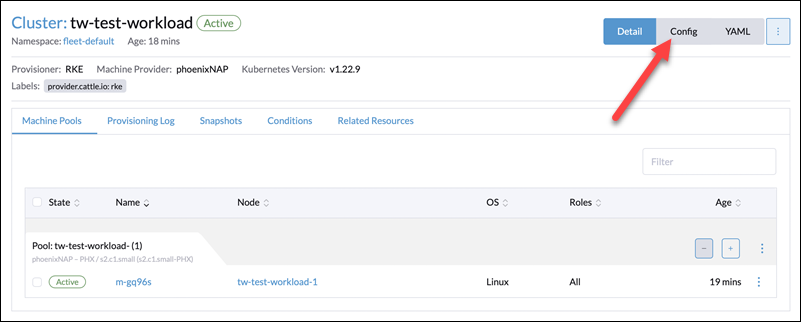
The Edit Cluster page appears. On this page, edit the name and description of the cluster and manage node pools.
4. Select the Add Node Pools button below the list of node pools.
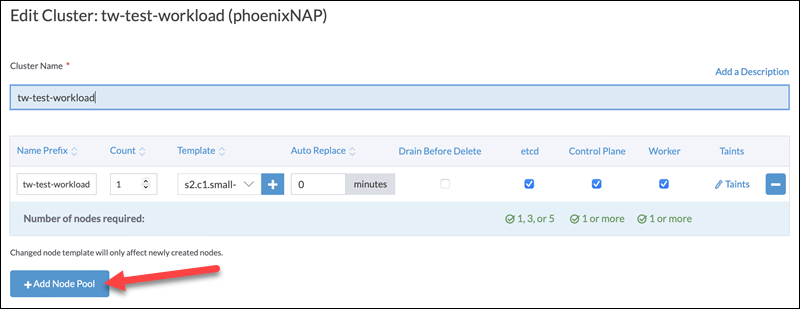
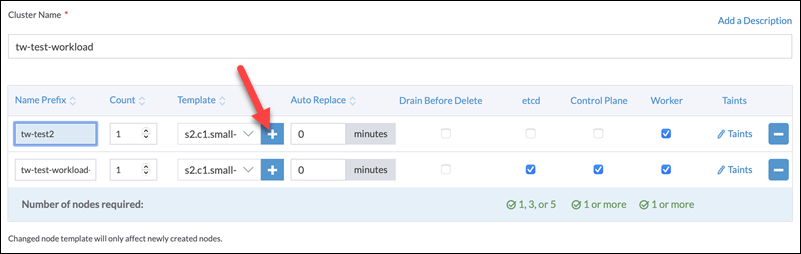
A new node pool appears in the list.
5. Type the name prefix for the new pool and select the number of hosts to provision upon pool creation.
6. Select the plus sign in the Template column to edit the node template.
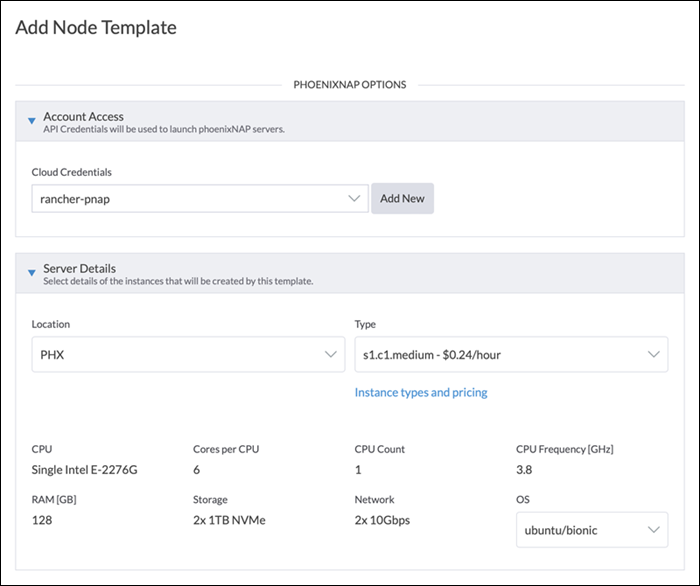
Node templates let you specify the configuration of the hosts in the node pool. The configuration options provided by the phoenixNAP BMC node driver include:
- Cloud Credentials. The access credentials for the node pool.
- Location. The location of your server instances.
- Type. The server instance types.
- OS. The operating system to be installed on the instances.
Apart from the options related to the node driver, Rancher enables you to label the template, apply a taint, and customize the Docker daemon configuration.
7. Configure the node template for the node pool server instances.
8. Provide a name for the template and click Create.
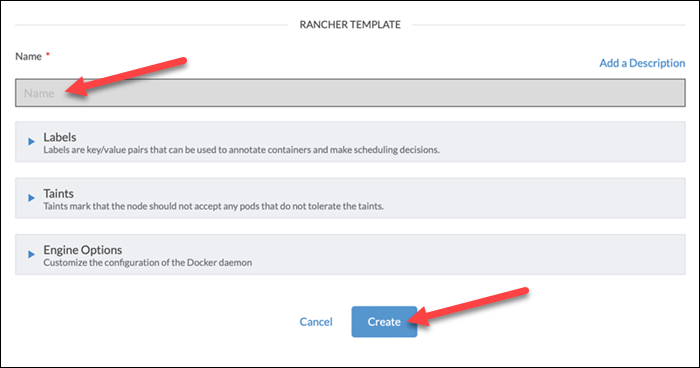
The node template is created and ready for use.
9. Scroll to the bottom of the Edit Cluster page and click Save.
Step 3: Scale Workload Cluster
All the node pools appear in the Machine Pools section of the main cluster page.
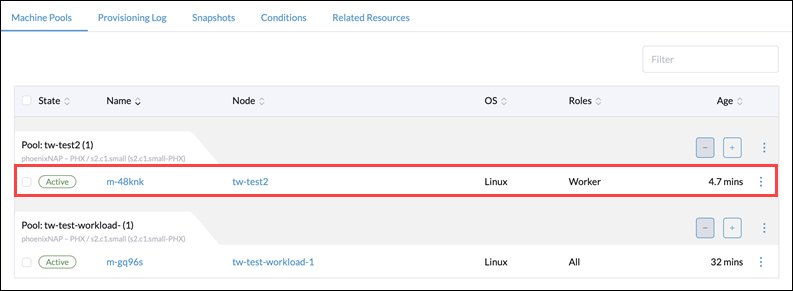
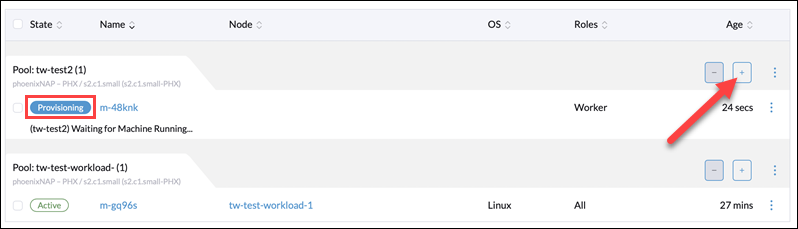
Initially, the node pool contains the number of machines specified during its creation. To add more nodes to the node pool, select the plus sign above the pool card.
The label next to the pool name changes from Active to Provisioning.
When Rancher finishes provisioning and registering the new machine in the cluster, the label switches back to Active.
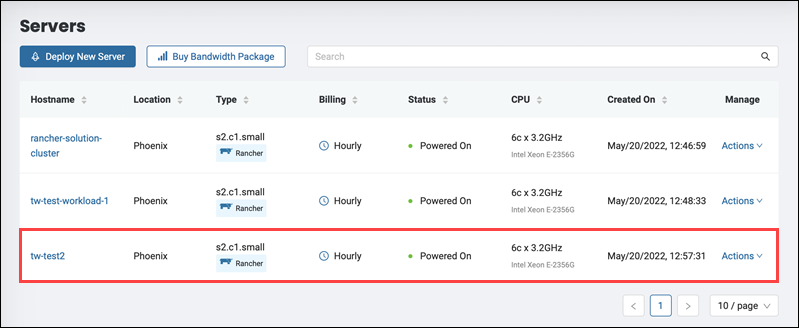
Confirm the provisioning of the new node by checking the list of provisioned servers on your host provider's page. The example below shows the newly provisioned server in the BMC portal.
Conclusion
This article introduced you to Rancher node drivers and explained how to add a new node driver to a Rancher deployment. Additionally, it provided steps for creating a new node pool and scaling a cluster.
To learn more about the benefits of deploying Rancher on BMC, read Rancher on Bare Metal Cloud.