Introduction
phpMyAdmin is a free, open-source application for managing MySQL and MariaDB relational databases.
Beginners and experienced database administrators use phpMyAdmin to interact with MySQL databases via a web-based, user-friendly interface instead of manually entering commands into the terminal.
Learn how to install and secure phpMyAdmin on Ubuntu 20.04 or 22.04.
Prerequisites
- Ubuntu 20.04 or Ubuntu 22.04 installed.
- A fully installed LAMP stack (Linux, Apache/Nginx, MySQL/MariaDB, PHP).
- A user account with root or sudo privileges.
- Access to a command line/terminal window.
Note: phpMyAdmin is a common target for cyberattacks, mainly due to misconfigurations or weak security settings. Connecting to a remote server and running phpMyAdmin over an unencrypted HTTP connection poses a security risk, as the data can be intercepted. For steps on setting up an encrypted connection using SSL/TLS certificates, please refer to our guide on SSL/TLS encryption.
Installing phpMyAdmin on Ubuntu
This guide assumes that you are installing phpMyAdmin on a system that is not publicly accessible over the internet, often referred to as a local system. Follow the steps below to install phpMyAdmin on Ubuntu 20.04 or 22.04:
Step 1: Update Your System
Access the command line and use the apt package manager to update the Ubuntu package repository and installed packages:
sudo apt update && sudo apt upgrade -y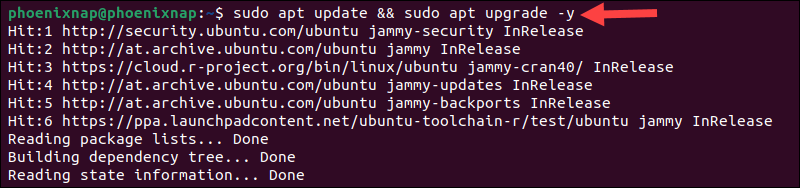
Allow the operation to finish.
Step 2: Install phpMyAdmin
1. Run the following command to install phpMyAdmin and its dependencies:
sudo apt install phpmyadmin -y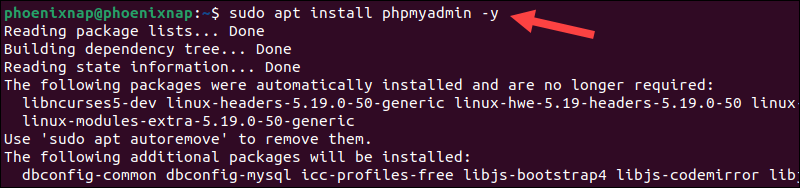
2. The installer prompts you to choose a web server to configure automatically. The apache2 option is already highlighted if the system uses Apache. Press Space to select apache2, then Tab to highlight Ok.
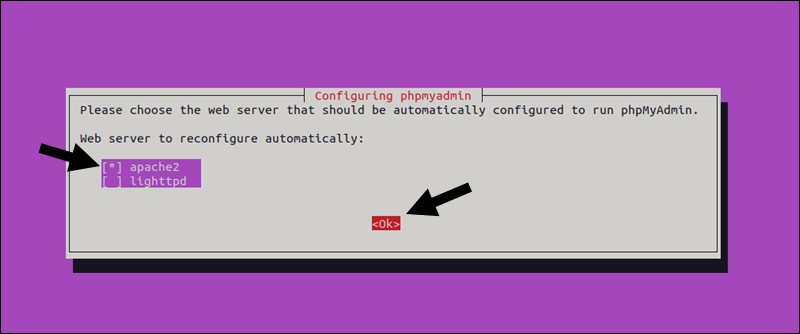
3. Press Enter to confirm the selection.
4. (Optional) Select Yes and press Enter to set up a phpMyAdmin database using the dbconfig-common configuration package.
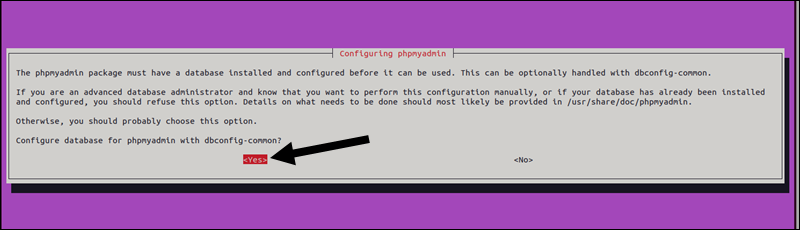
Note: Advanced users can attempt to configure the database manually. Find more information about the dbconfig-common package on Debian's official website.
5. The installer creates a default user named phpmyadmin. Type a strong password for the phpmyadmin user and hit Enter.
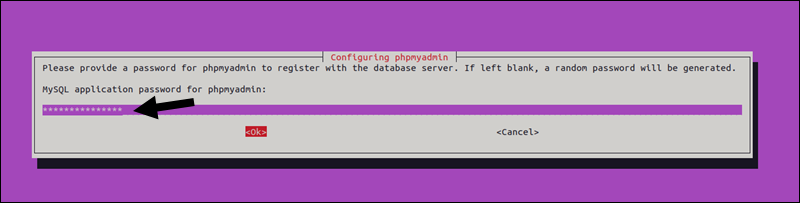
Note: Leaving the password field blank causes the system to generate a random password.
6. Confirm the password and press Enter.
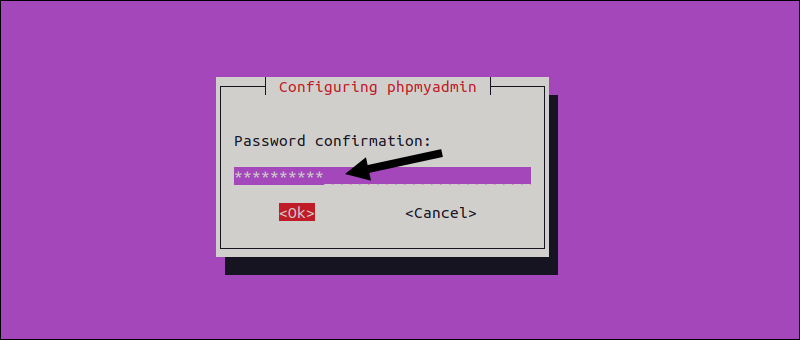
The default phpmyadmin user is typically used for managing the phpMyAdmin database, which stores metadata and settings for bookmarks, history, logs, and other advanced features. This user should not be used for general database management tasks because it is restricted to the phpMyAdmin database.
Database administrators typically use the MySQL root user or another user with appropriate permissions.
Step 3: Create a New MySQL Administrator Account
phpMyAdmin provides a web interface to MySQL, including a root user with full administrative privileges.
Ubuntu 20.04 and 22.04 use the auth_socket plugin for root authentication. This authentication method does not allow password-based login for root users and disrupts the standard way phpMyAdmin is used to access MySQL.
Ubuntu users need to create a new MySQL user with administrative privileges or reconfigure the existing root user to enable password-based authentication.
To create a new phpMyAdmin user for accessing a MySQL database:
1 . Open the MySQL terminal and log in as the sudo (or root) user:
sudo mysql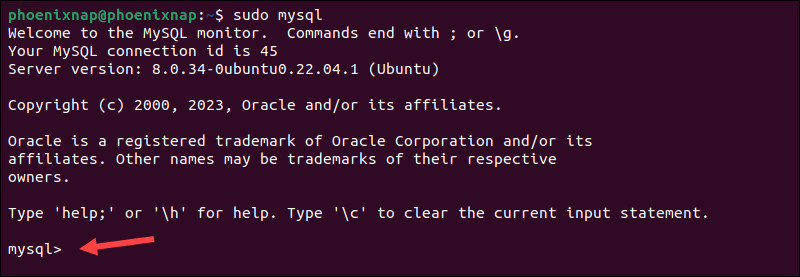
The terminal prompt shows that the MySQL shell is active.
2. Use the following command to create a new user with a secure password:
CREATE USER 'newuser'@'localhost' IDENTIFIED BY 'password';Replace [newuser] with a username of your choice and [password] with a strong password.
3. Assign appropriate privileges to the new user. For example, to allow this user to perform all operations on a database called mydatabase, run:
GRANT ALL PRIVILEGES ON mydatabase.* TO 'newuser'@'localhost';
4. Flush all privileges:
FLUSH PRIVILEGES;5. Exit the MySQL terminal:
EXIT;
6. Open a browser and access the phpMyAdmin login page by entering:
localhost/phpmyadminor
192.168.0.1/phpmyadminor
www.yourdomain.com/phpmyadmin7. The browser displays a screen welcoming you to phpMyAdmin. Enter the newly created username and password and click Go.

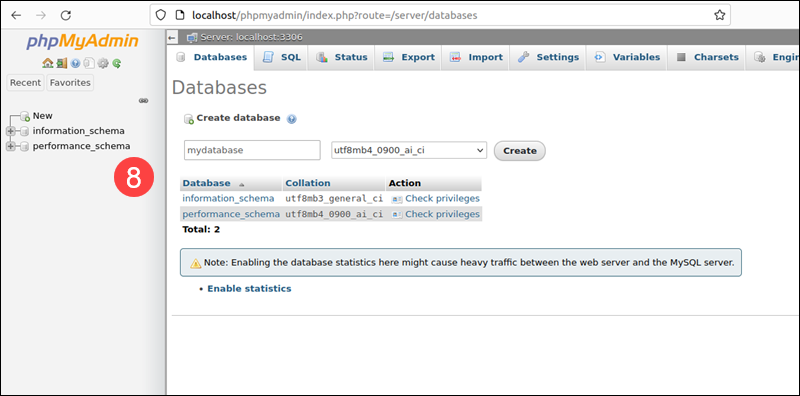
8. The browser loads the phpMyAdmin dashboard.
Step 4: Secure phpMyAdmin Instance
Two simple ways to enhance the security of your phpMyAdmin instance include configuring the Apache .htaccess file and creating a URL alias for phpMyAdmin.
Using .htaccess (Apache)
The .htaccess file can restrict access based on IP addresses or require users to enter an additional password before accessing the phpMyAdmin login page:
1. Use a text editor, like nano, to open and edit the phpMyAdmin Apache configuration file:
sudo nano /etc/apache2/conf-available/phpmyadmin.conf2. Find the following two lines in the <Directory /usr/share/phpmyadmin> section:
Options SymLinksIfOwnerMatch

DirectoryIndex index.php
3. Append the following text:
AllowOverride All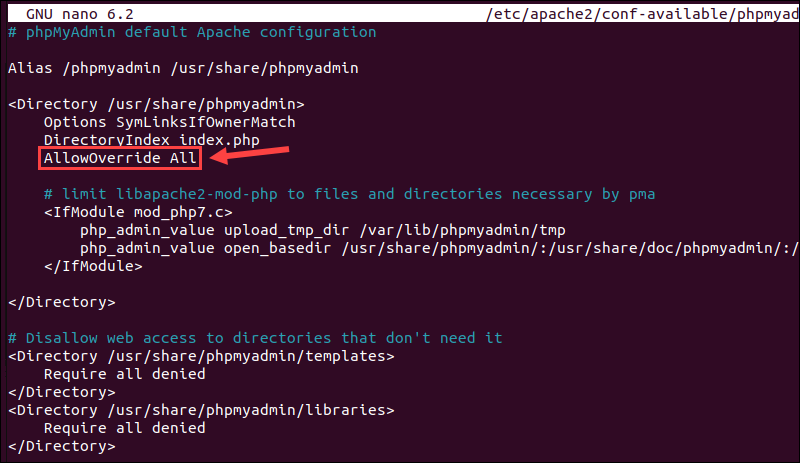
4. If using nano, press CTRL+X to initiate the exit process. Then press y to confirm that you want to save the changes, followed by Enter to complete the save and exit.
5. Restart the Apache web server:
sudo systemctl restart apache26. Create a new .htaccess file within the phpMyAdmin directory:
sudo nano /usr/share/phpmyadmin/.htaccess7. Add the following lines to the .htaccess file:
AuthType Basic

AuthName "Restricted Access"

AuthUserFile /etc/phpmyadmin/.htpasswd

Require valid-user
These commands instruct .htaccess to use basic authentication, where to find a list of valid users and to restrict file access only to valid users.
8. Press CTRL+X, and then y followed by Enter to exit the file and save the changes.
9. The .htaccess file generates a prompt, mandating users to enter valid credentials to access the phpMyAdmin directory. Use the following command to create the username and password for the .htaccess prompt:
sudo htpasswd -c /etc/phpmyadmin/.htpasswd secretusernameReplace [secretusername] with the username you want to use to access the phpMyAdmin directory.
The system asks to enter and confirm a password.

10. (Optional) To add additional users, utilize the same command without the -c flag:
sudo htpasswd /etc/phpmyadmin/.htpasswd anothersecretuserChange URL (Apache or Nginx)
A URL alias makes the phpMyAdmin location less predictable, which can deter automated attacks.
To set up a URL alias for phpMyAdmin via the Apache web server, you need to edit the phpmyadmin.conf file. On Ubuntu and Debian-based systems, the file is usually located in the /etc/apache2/conf-available/ directory.
To edit the phpmyadmin.conf file in Ubuntu 20.04 or 22.04:
1. Back up the configuration file:
sudo cp /etc/apache2/conf-available/phpmyadmin.conf /etc/apache2/conf-available/phpmyadmin.conf.backup2. Open the phpmyadmin.conf file using a text editor, such as nano:
sudo nano /etc/apache2/conf-available/phpmyadmin.conf3. Find the line that starts with the word Alias:
Alias /phpmyadmin /usr/share/phpmyadmin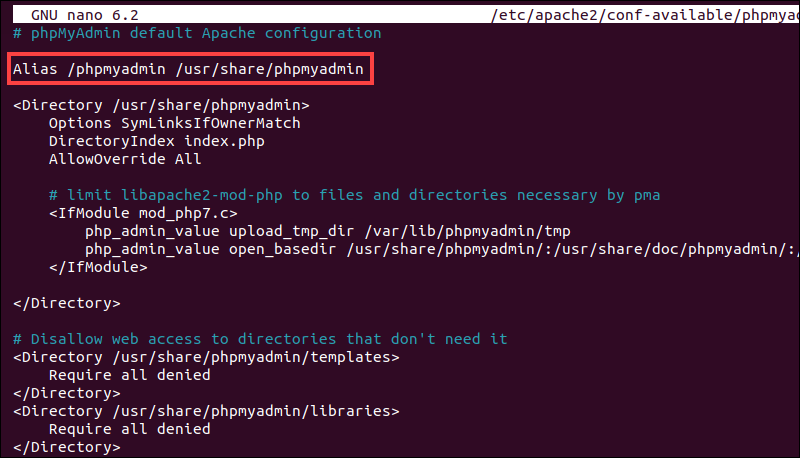
4. Change /phpmyadmin to an alias you want to use. For example, to change it to /secureadmin, modify the line to:
Alias /secureadmin /usr/share/phpmyadmin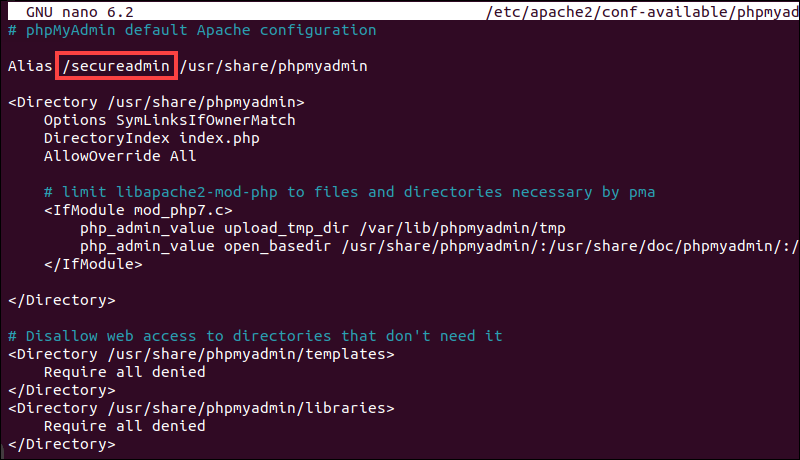
5. If using nano, press CTRL+X, then y, followed by Enter to exit the file and save the changes.
6. Reload the Apache web server to enable the new configuration:
sudo systemctl reload apache2Step 5: Test Your Setup
To test the .htaccess setup and the URL alias:
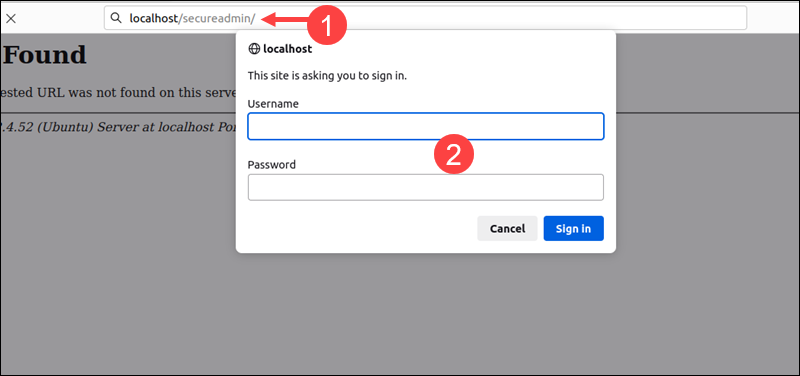
1. Open a browser and visit the phpMyAdmin URL alias. In this example, the alias is secureadmin:
http://localhost/secureadmin2. The system prompts for the username and password specified in the .htaccess file. Enter the .htpasswd credentials to access the standard phpMyAdmin login page.
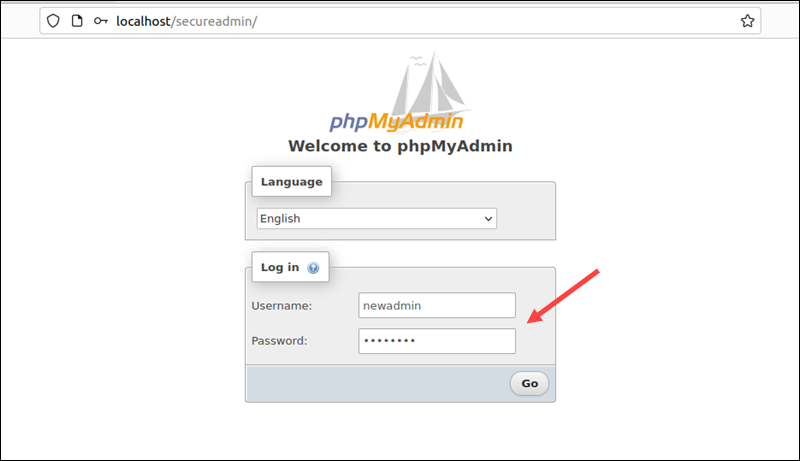
3. Use the MySQL admin credentials created previously to access the phpMyAdmin dashboard.
Changing the URL is a form of security through obscurity, which is generally not robust. While it may deter the most basic automated attacks, it will not provide a solid layer of database security. To improve phpMyAdmin security, you can:
- Limit the IPs that can access the phpMyAdmin installation.
- Allow access to phpMyAdmin only over a VPN or an SSH tunnel.
- Implement Two-Factor Authentication (2FA) to add an extra layer of security.
- Do not show PHP errors or MySQL errors publicly. This could reveal sensitive information.
- Keep track of access logs and set up alerts for suspicious activity.
Conclusion
You have successfully installed phpMyAdmin on Ubuntu and used Apache's built-in features to restrict access and secure phpMyAdmin directories.
Find out how to improve MySQL database performance and streamline database administration tasks using a MySQL commands cheat sheet.