Introduction
MariaDB is an open-source, fully compatible relational database management system. It is commonly used as a replacement for MySQL due to its fault tolerance, speed, and scalability.
In this tutorial, you will learn how to install the latest version of MariaDB on Ubuntu.
Prerequisites
- Access to the terminal.
- A user account with root privileges.
- The apt package manager, included on Ubuntu by default.
How to Install MariaDB on Ubuntu
Installing MariaDB on Ubuntu is straightforward and can be done with a single command. Since the apt package manager automatically handles dependencies, updates, and security patches, it significantly reduces maintenance overhead.
To install MariaDB from the Ubuntu repository, follow the steps below:
Step 1: Update Package Repository
Update the system package list to ensure you get the latest version available in the repository. Run the command below:
sudo apt updateStep 2: Install MariaDB
Install the MariaDB package by running the following command:
sudo apt install mariadb-server -yThe -y flag automatically answers yes to any prompts during the installation. You can remove the flag if you want to review the prompts.
After installation, the MariaDB service starts automatically.
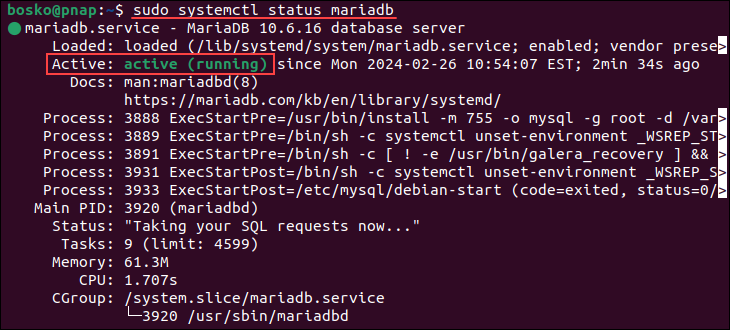
Step 3: Verify Installation
Verify that the database service is active and running. Run the following command:
sudo systemctl status mariadbThe following image is an example of the expected output:
Step 4: Configure MariaDB
It is recommended to configure your database security levels and access privileges by running the mysql_secure_installation script. Since MariaDB is a popular fork of MySQL, the script applies to it as well. Run the command below and follow the steps outlined in our tutorial to improve your server security:
sudo mysql_secure_installationThe script allows you to configure the root user password and create MariaDB user accounts, among other settings.
Step 4: Create User With Admin Privileges (Optional)
The root MariaDB user authenticates using the unix_socket plugin by default instead of a password. While that provides better security and usability in most cases, it can also create obstructions for some external programs that require administrative rights.
The solution is to create a new account with the same privileges as the root account and configure it to authenticate with a password. Follow the steps below:
1. Open the MariaDB prompt in your terminal:
sudo mariadb2. Create a new user with root privileges and password-based authentication. Use the syntax below:
GRANT ALL ON *.* TO '[username]'@'localhost' IDENTIFIED BY '[password]' WITH GRANT OPTION;Replace [username] and [password] with your choice.
3. Flush the privileges to ensure they are saved:
FLUSH PRIVILEGES;
How to Connect to MariaDB from the Command Line
To connect to MariaDB from the command line, run the command below:
mysql -u root -pYou can also replace root with the user you have created in the previous steps. Provide the password for the specified user, and the following screen appears:
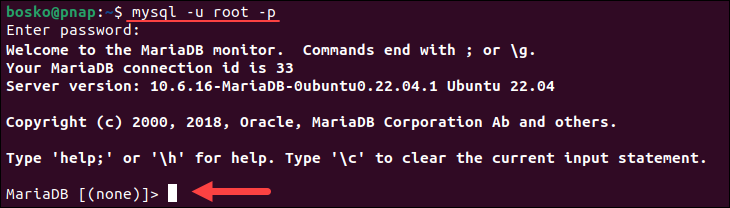
Now, you have access to the MariaDB monitor, allowing you to manage your database.
To exit the monitor and return to the terminal, run:
exit;or
\qNote: If you need a database for storing complex data that allows you to modify documents without affecting existing data structures, try installing MongoDB.
Conclusion
By following the steps in this article, you have successfully installed MariaDB on your Ubuntu system. Additionally, you improved database security levels by editing the default settings and creating a new user with admin rights.
Next, see how to create users in MariaDB or troubleshoot the "access denied for root@localhost" error.